Your Cart is Empty


- Shop by Category
- Shop by Brand
- Shop Sale
- Custom Wheel Build
Tools and Supplies you will need:
All Chris King bearings are serviceable and easily accessed. Bottom bracket and headset bearings should be serviced in place and not removed from the cups as they are a secure press fit. Hub bearings can be left in the hubshell for service, accessible using just a single 2.5mm hex wrench.
Once you have accessed the bearings, begin by removing the snapring and seal. At the snapring split, find the acute point of the inner edge, seen below, and move 2cm over from that point, use a pick or dulled knife to gently pry the snapring and remove it. Take care not to puncture the seal, these parts are designed to be reused. The seals break-in with use and have less drag compared to a new seal. If you do damage either we have replacement kits available for all Chris King products.

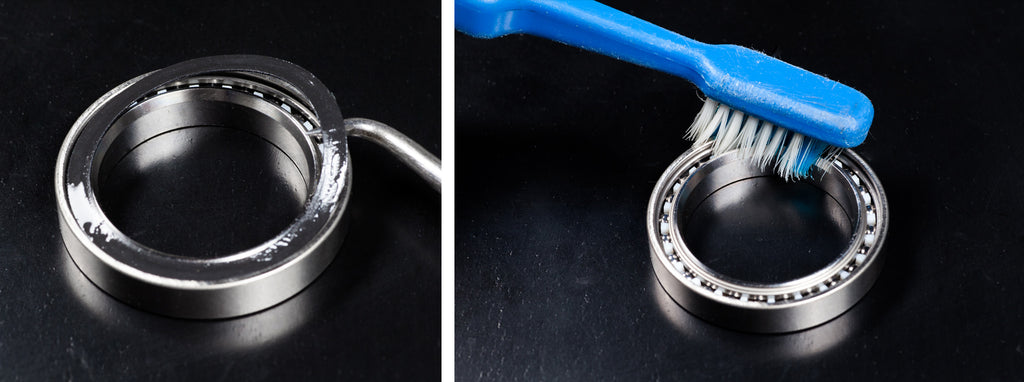
Once the snapring is removed, remove the seal. Now clean the bearing with a non-citrus degreaser and toothbrush. Then dry with compressed air and repeat as necessary.
To check your work, load the bearing by pressing on the inner race with two fingers and rotating. The bearing should feel smooth and rotate freely.
Now that the bearing is clean and dry there are a few options for lubrication. For increased durability and the best protection against the elements, we recommend a medium viscosity lubrication and a full fill. If you are looking for greater performance and riding in dry conditions, you can use a lower viscosity lubrication and a lesser fill, like shown below.
Once you have chosen a synthetic lubrication appropriate to your riding conditions and style, lay a bead around the bearing. Then rotate the bearing to distribute the lubrication.

When reinstalling the seal, be sure that the seal is curved upwards in the middle. Seat the seal with your finger. If the seal bunches up, the outside edge is not fully seated into the seal groove. Install the snap ring beginning with the acute outer point, sliding it into the snapring groove. Check that it is fully seated into the groove by running the blunt side of a pick over the split to make sure they are flush.

Remove any excess lube and you have serviced a Chris King bearing, ready for many more years of use.